One of the first tasks you would need to do while learning development or starting a new project is to deploy development environment(s). There are two ways for doing so. The first is the more straightforward way using LCS. This method, however, comes with the burden of Azure costs which you would want to avoid especially if you are going to use the environment for learning purposes. This post covers all the steps you would need to deploy your first environment locally using Hyper-V.
Prerequisites
Here are the prerequisites before we start off with the deployment of your development VM –
-
Access to LCS and Azure portals
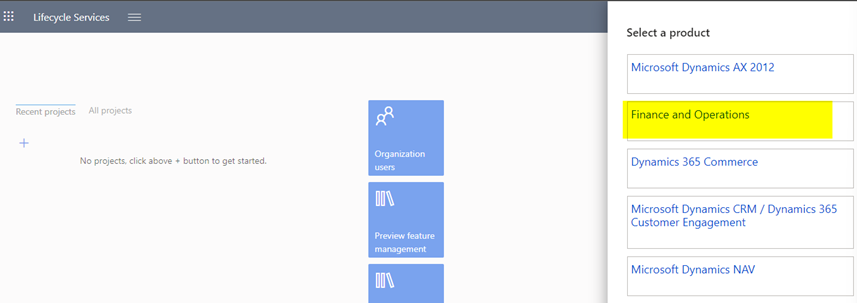
You might be a part of an organization that has access to LCS and Azure portals. If not, you can sign up for Microsoft 365 Developer program and get access to both LCS and Azure portals. You can follow this link to setup the Developer subscription. On setting up the subscription, you can use the Admin user name and password to access LCS and Azure portal. After logging into LCS portal, you can create a new project and select “Finance and Operations” as the product”
- Having a system that can support running Hyper-V. The system should have enough space and preferably have SSD drives installed so that the VMs don’t run slow.
Downloading VHD from LCS
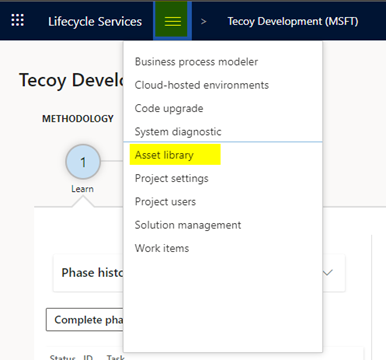
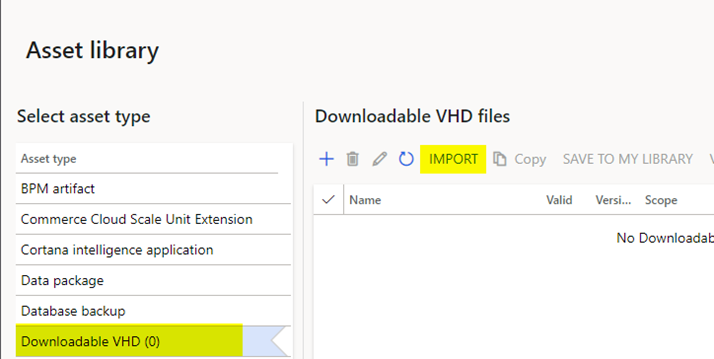
The first step is to download the VHD files from LCS portal. You can go to Asset library in your LCS project and choose “Downloadable VHD”. You can then click on “IMPORT” button which brings up a dialog to choose the files you need to download.
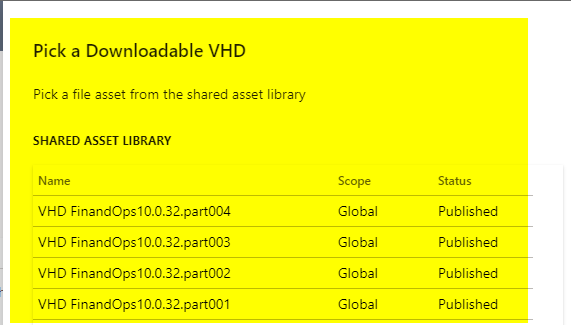
On picking the files, you should be able to see them under the “Downloadable VHD files” and be able to dowload them. At the time of writing this post, Version 10.0.32 was the latest version available. You should pick a later version, if that is available.

You should download all the files in the same folder. Only the first part is of type .exe and the rest of them are compressed files of type .rar. You have to run the .exe file to extract the VHD file.

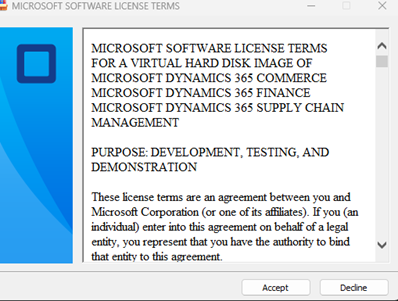
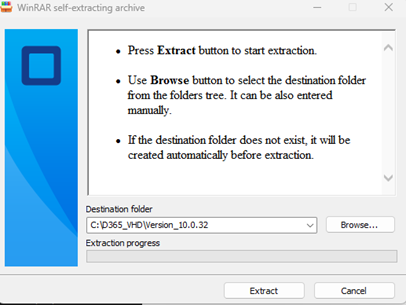
On running the .exe file, you should accept the Terms and then choose a location where you would like to extract the VHD file.
Configuring VM in Hyper-V
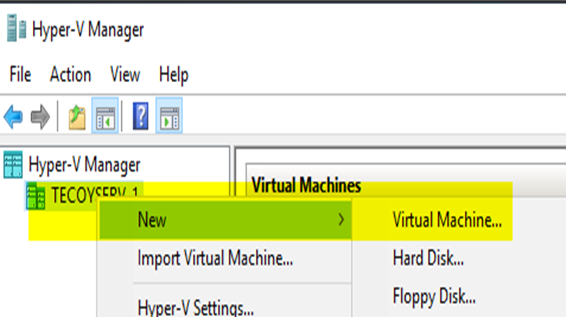
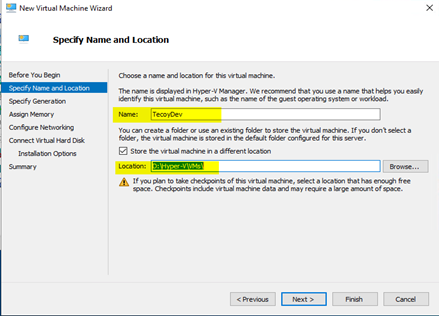
Start Hyper-V manager on your system and highlight the server and create a new Virtual machine. You can then specify the specify the name and location where you want to save the VM files.
Generation 1 VMs are compatible with VHD file format and hence you would need to select this in the next step. We specify the RAM you would need to assign to the VM. I would recommend at least 15 GB for optimum performance.
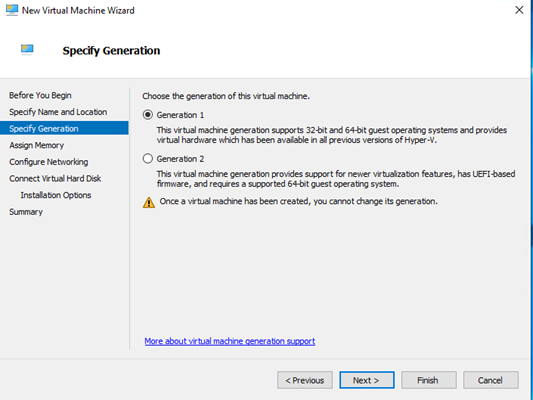
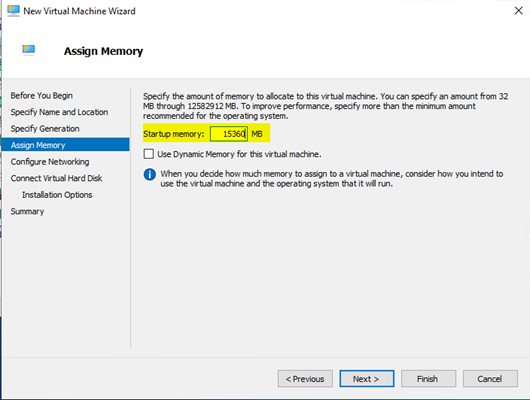
This VM would need to connect to the internet. You can use the Default virtual switch or create a new one following this link. You can choose the virtual network switch in the next step. For the last step you can choose the option “Attach virtual disk later”. On clicking “Finish”, the VM should be created.
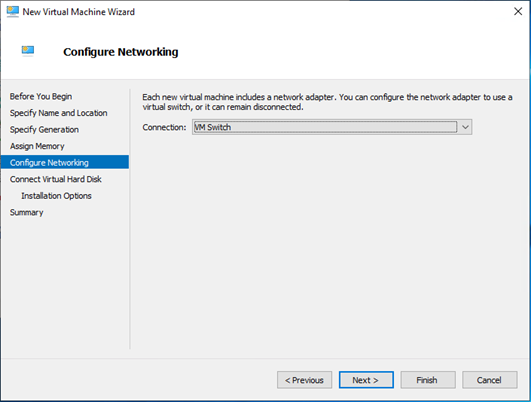
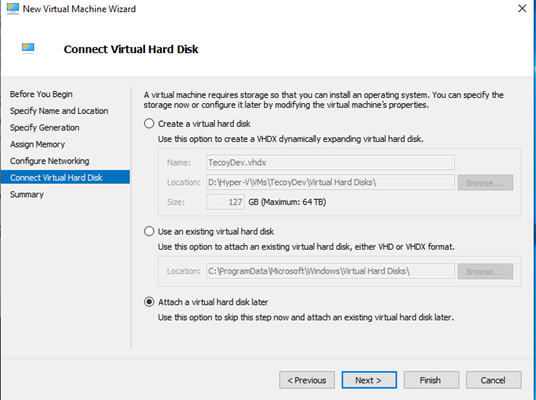
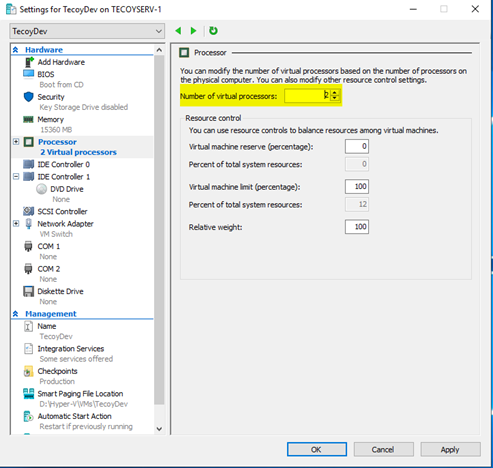
The last step will be to copy the VHD file to the same location you selected while creating the VM in a new folder “Virtual Hard Disks”. We can open the Settings for the VM and make the following changes –
-
Change the “Number of virtual processors” to at least 2.
-
Highlight on IDE Controller 0 and create a new Hard Disk. You can then browse to the VHD file.
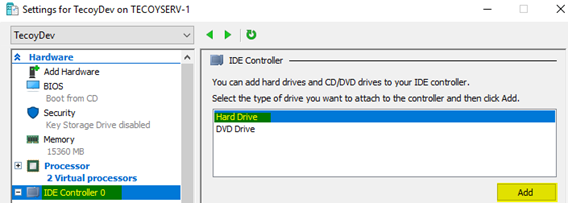
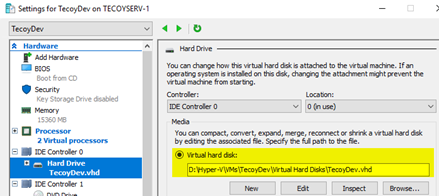
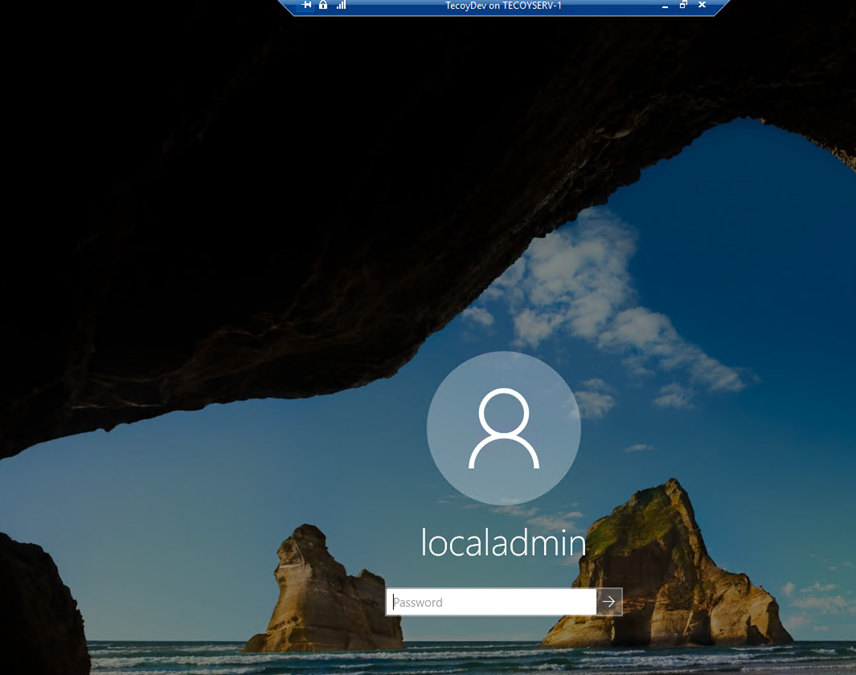
After these steps, you can right click on the VM and select “Start”. Once the VM is running, you can right click on the VM again and select “Connect”. On connecting to the VM, you get the login screen. The user localAdmin comes up by default. You can use the password ‘pass@word1’ for this account to login to the server.
Server configurations before first use
Renaming the server
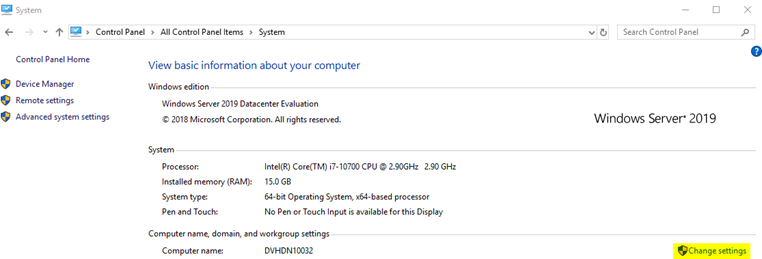
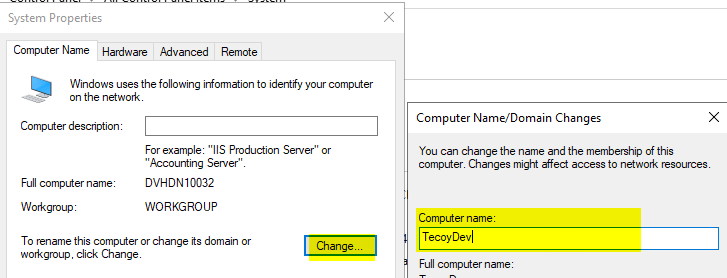
Once you have logged into the server, the first step is to rename it. This is essential especially if you are accessing a single Azure DevOps project across multiple development VMs. Go to Control panel > System and click on “Change settings” as highlighted. In the settings window, you can change the computer name and restart the VM.
App registration in Azure portal
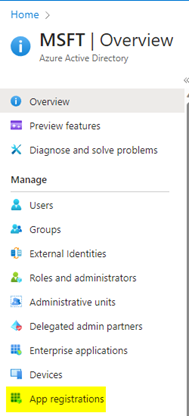
The first step would be to register a new application in Azure active directory. Go to Azure portal and select Azure active directory > App registrations. Click on “New registration” and fill out the details as shown below. Click on the button “Register” to complete the registration.
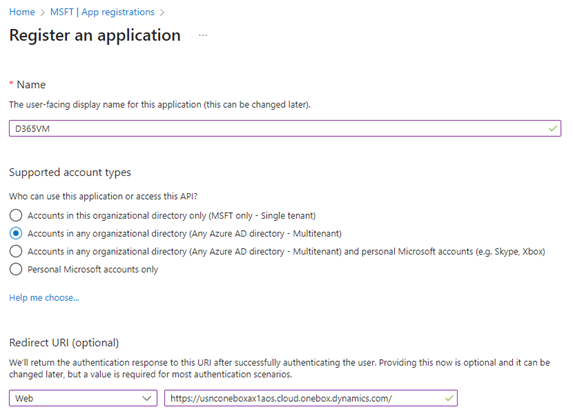
Go back into the app registration and add the URI under Web authentication as shown below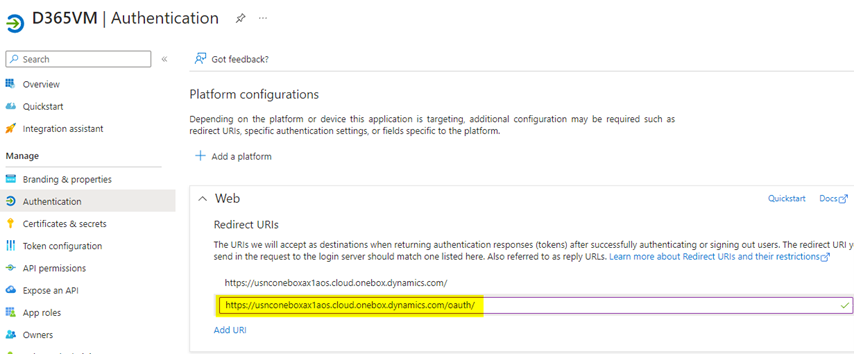
Make a note of the Application Id from the Overview section as it will be required later.
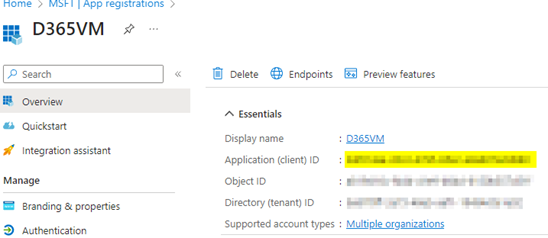
Generating certificates
In your desktop, you will be able to see a Powershell shortcut – “Generate self-signed certificates”. Double click on it and provide the App Id noted from the earlier step when asked.

To generate a new certificate type “N” when asked “Do you have an existing certificate for the provided Application Id?”.

Admin user provisioning:
The last step would be to provision the Admin user for this environment. You should be able to find a shortcut on your desktop named “AdminUserProvisioning”. Double clicking this shortcut should prompt you to enter the email address you want to use for your VM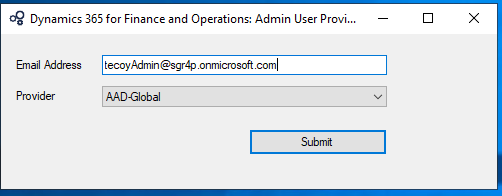
For more details regarding these steps, you can check this link.
Additional information
The D365 F&O application is hosted in IIS of the server deployed. If you want to look at more details regarding the AOS service, you can navigate to IIS manager and check under Sites. You can click on the link under Browse and open the D365 interface.

You should also check the server license as it is an Evaluation license which is valid for a short duration. You should apply a valid Windows server license and upgrade from Evaluation to Datacenter.

